 |
|
 |
||||
|
We support Ron Paul for President 2012. I think the founding fathers would be very disappointed in what has become of the American government and its leaders; we now have a corrupt empire that largely ignores its own constitution and tramples on individuals' liberties. The founding fathers would like Ron Paul, however. Congressman Paul consistently votes no on issues that are unconstitutional. If elected Ron Paul will end our wars, close our hundreds of military bases across the globe and end our unsustainable, financially irresponsible empire. Ron Paul has more support from US troops than all other presidential candidates combined! Dr. Paul is critical of government corruption and believes in protecting whistleblowers. As a congressman, Paul does not participate in the congressional pension, has never voted to raise congressional pay and as President he would draw a salary of just $39,336, which is the median salary of the American worker. Paul believes the War on Drugs is not working, is a waste of money, and violates citizen's personal freedoms. Congressman Paul has never voted for: raising taxes, an unbalanced budget, a federal restriction on gun ownership or an increase in the power of the executive branch. Paul is the only presidential candidate proposing a viable balanced budget. He voted against: the Patriot Act, the TARP bailouts, regulating the Internet and the Iraq war. Search YouTube for " Ron Paul predicts " to see how Paul has predicted many of our current major problems and crises years or decades before they happened. Please do not waste your vote on the status-quo; elect Ron Paul for US President in 2012. - David & Joan Hall
|
||||||
|
Come see the entire Hall Family in HONK!
Fun for the whole flock…er, family! bring the ducklings along! Dynamics Community Theater presents: HONK! August 3, 4, 10, 11 at 7:30 pm at the Tallmadge high school auditorium call 330-217-1227 or email dynamics@tallmadgeschools.org for ticket reservations. All seats reserved. Reserve early for best seats! Adults $9 Students/ducklings/seniors $7 HONK! "A Musical Tale of "The Ugly Duckling" Music by Book and Lyrics by GEORGE STILE ANTHONY DREWE Honk! Is presented through special arrangement with Music Theatre International (MTI). All authorized performance materials are also supplied by MTI. 421 West 54th Street, New York, NY 10019 Phone: 212-541-4684 Fax: 212-397-4684 www.MTIShows.com The up-and-coming musical from England |
||||||
| 1-6-07 |
(Scroll down for the most recent entry)
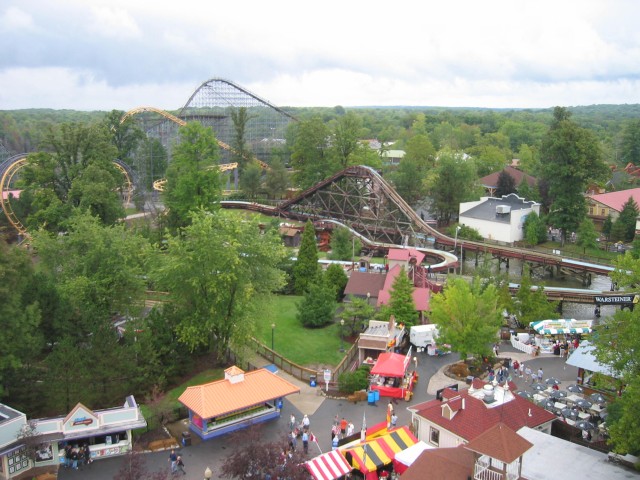
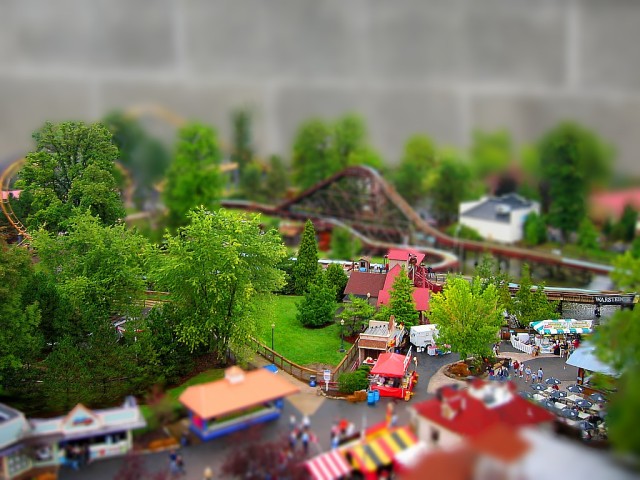
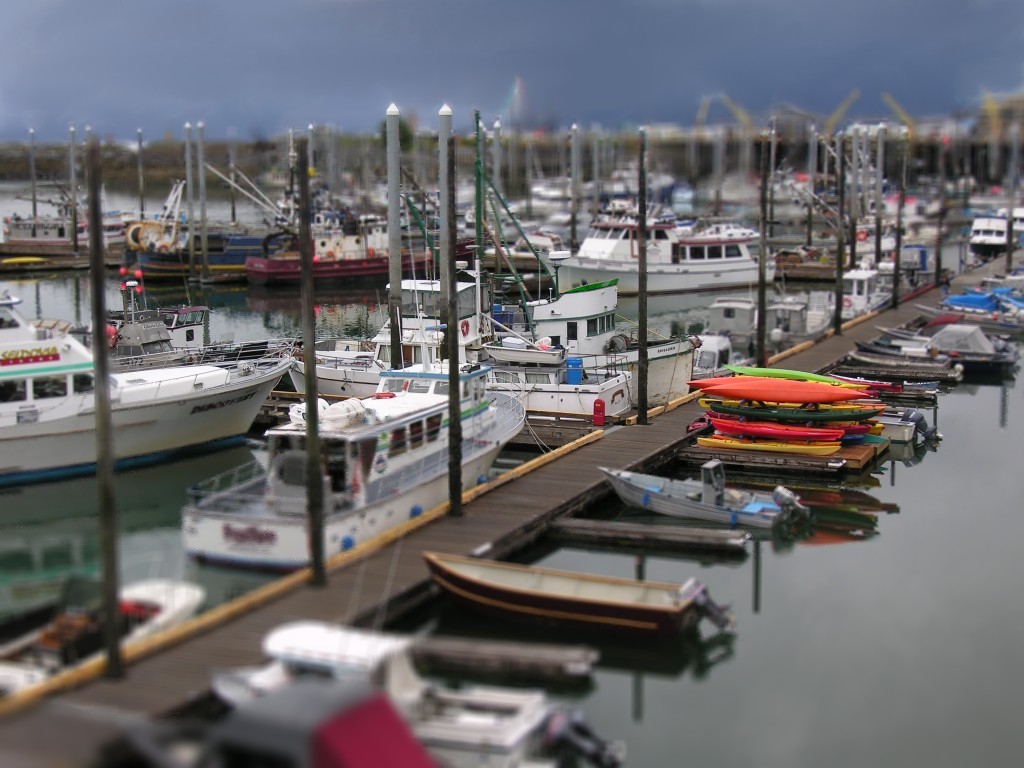
How to make Fake Dioramas with MS Paint (And any basic photo editing program) Below is the original picture of Geauga Lake taken from the Americana Ferris Wheel. (Resized to 1024 by 768 resolution and saved as a bitmap)
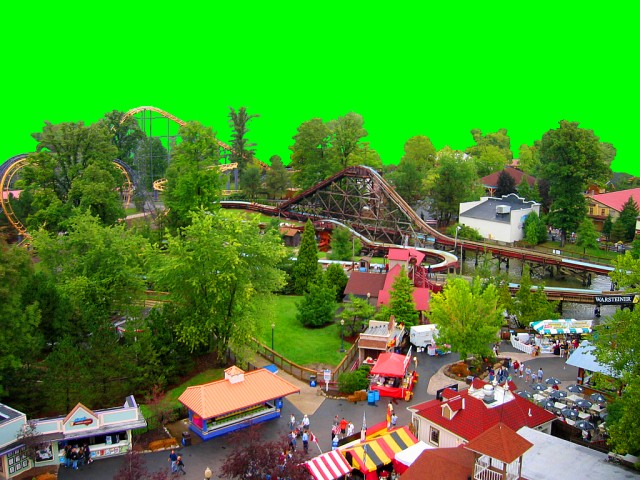
Using a basic photo editing program, the saturation of the picture has been turned up (below). The brighter saturated colors give the trees a plastic look and diminish the appearance of atmosphere, which would not be visible in a diorama. The picture also has been minimally sharpened. The picture is then opened in MS Paint where everything beyond an imaginary line is erased with lime green (The eraser color in Paint can be changed by right clicking on the desired color.)
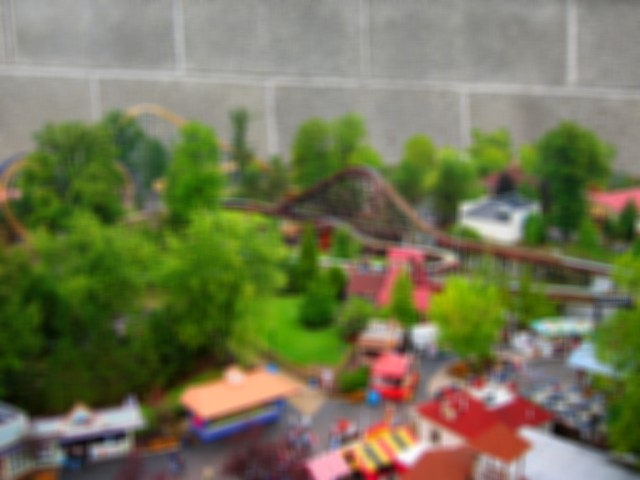
To give the impression that the amusement park picture is a diorama in a basement, it is then pasted over a picture of a CMU wall. MS Paint has a transparent color tool; the transparent color is also the background color. (Note: it is critical that the pictures are always saved as bitmaps; JPEGs in Paint lose much quality and the lime green background will blend into several shades of lime green, only one of which will be transparent.) The merged picture is then opened in a basic photo editing program and a blur effect is applied over the entire picture. Several copies are saved at different levels of blurriness.
Each picture is trimmed by erasing areas outside of its focal zone. Below is the intermediate zone of this picture that will be between the very out-of-focus zone and the in-focus zone.
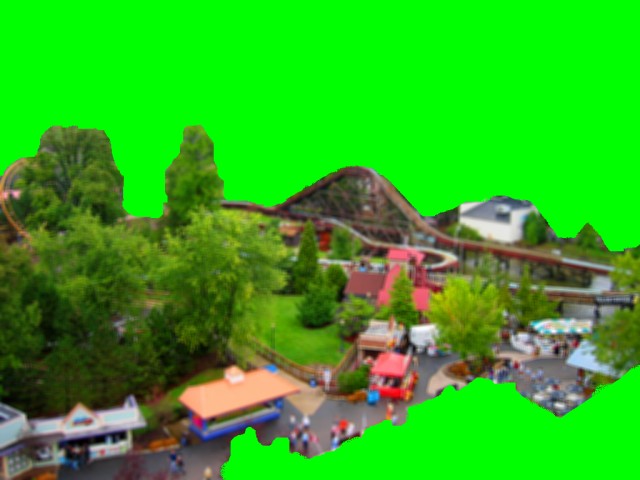
Below is the narrow zone of this picture that will be in focus. Note that this is not a band across the center; focus is determined by distance. For example: if you look at a picture of a diorama or model, everything from 24 to 30 inches from the lens may be in focus. Closer and further portions of the diorama will become more blurry the closer they are to the lens, or the further they are past the focal zone. This means that all of a vertical object, such as a tree, will be in or out of focus.
The final step is to stack the layers on top of each other starting with the blurriest background layer; this takes less than a minute. Remember the lime green is set to transparent. Below you can see three separate focal zones. If needed, the picture can be re-opened with a basic photo editing program and the areas where the zones meet can be smudged.
Geauga Lake - Ohio Click here to view in 1024 x 768 resolution.
|
Hall Family Website hallbuzz.com | ||||
|
||||||
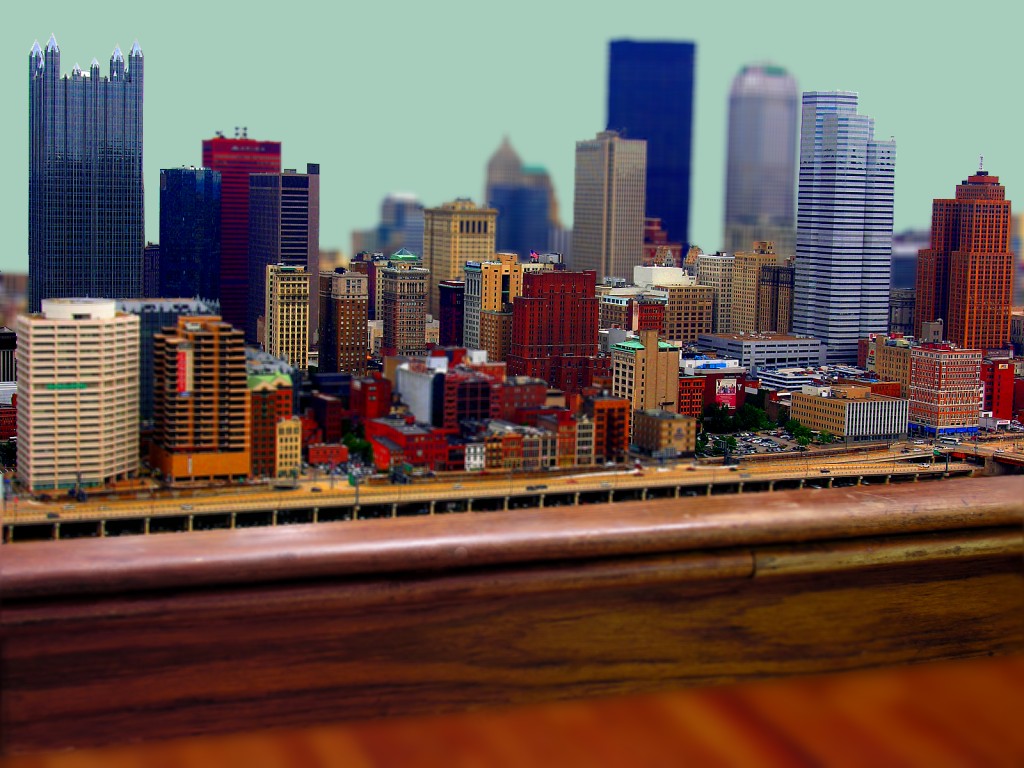
| 8-1-07 |
Click here to view in 1024 x 768 resolution.
|
|||||
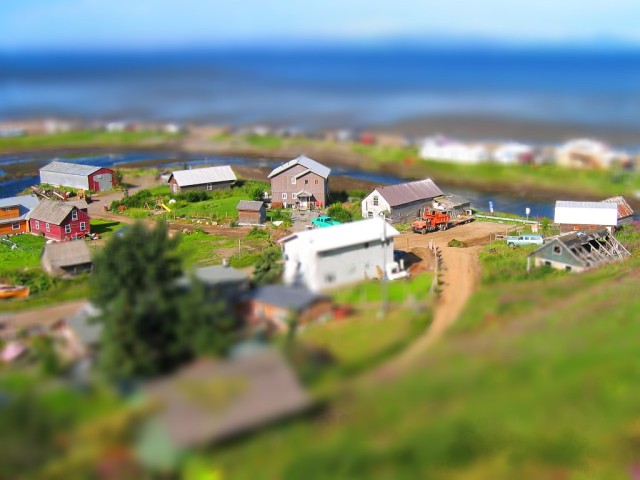
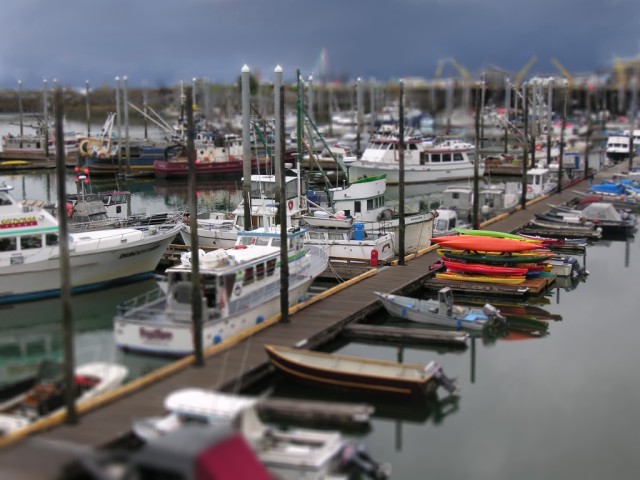
| 1-7-07 |
Ninilchik, Alaska
Ninilchik Alaska Click here to view in 1024 x 768 resolution.
|
Hall Family Website hallbuzz.com | ||||
|
||||||
|
12-23-06
|
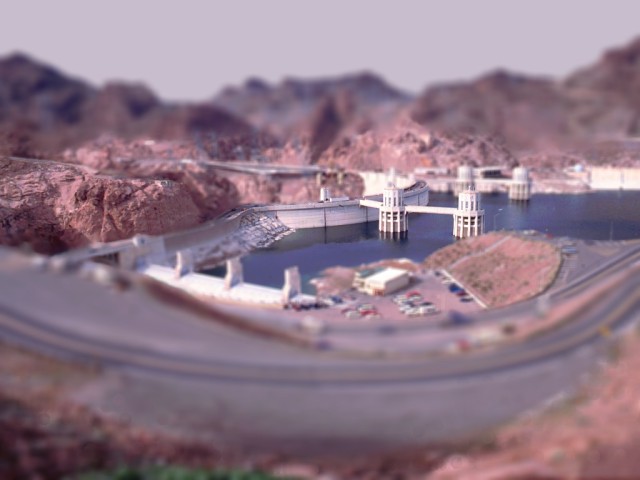
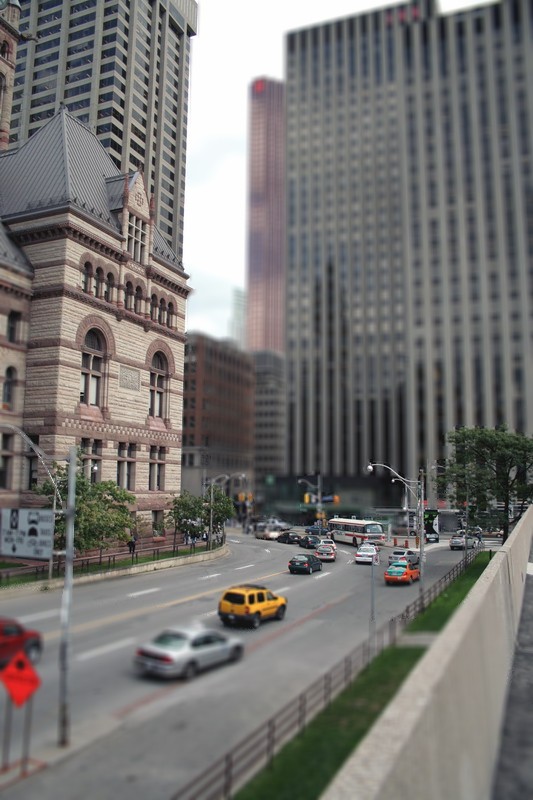
More Fake Dioramas
Hoover Dam - Nevada/Arizona Click here to view in 1024 x 768 resolution.
Homer Harbor - Alaska Click here to view in 1024 x 768 resolution.
Independence Mine - Alaska
Downtown Toronto
|
Hall Family Website hallbuzz.com | ||||
|
||||||
|
(Hits from different computers) |
||||||


